
Today, we will learn how to create signed and unsigned APK files. All APK files are signed before being distributed through various platforms. The developers usually sign with their private key before publishing on play store or other markets. They Key is very important since you cannot sign the same APK later with a different signature because it will not allow your users to update from a previous version without losing their progress or making them to uninstall the previous version to install your new APK, which can have a bad user experience.
– Unsigned APK: It is basically an APK file that hasn’t been signed after modifying it. The original signature is not changed here.
– Signed APK A signed APK file is an APK file that has been signed and can be installed on Any supported Android device, however here the original signature has been changed.
When it comes to signing APK files, we can even sign it with our own methods, however signed APK files has some limitations such as not being able to sign in to google play in order to save our progress or be able to make in-app purchases.
Also in future when you update the application you need to sign it with the same method in order to install over the previous version.
Unsigned APK files are useful because it doesn’t original signature of the application. This allows you to sign in to Google Play to save your progress and make in-app purchases. However, installing an unsigned APK requires your device to be rooted and the signature verification to be removed.
You can remove the Signature verification using Lucky Patcher or MT Manager VIP version. I have shown how to do it below using Lucky Patcher
How to Create a Signed APK?
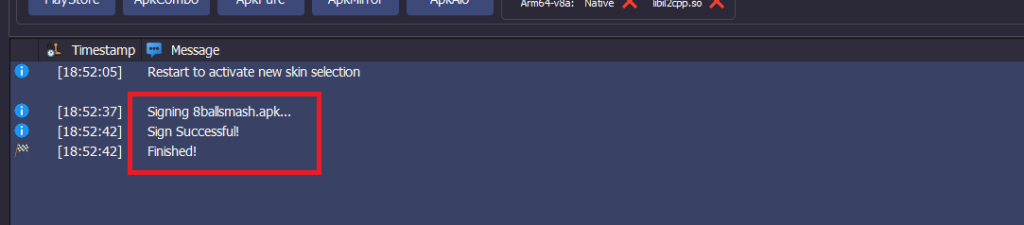
– It is pretty straight forward, after you make changes to the APK file, just sign it using any signing tool such as APK TOOL KIT, MT Manager, APK TOOL or any other
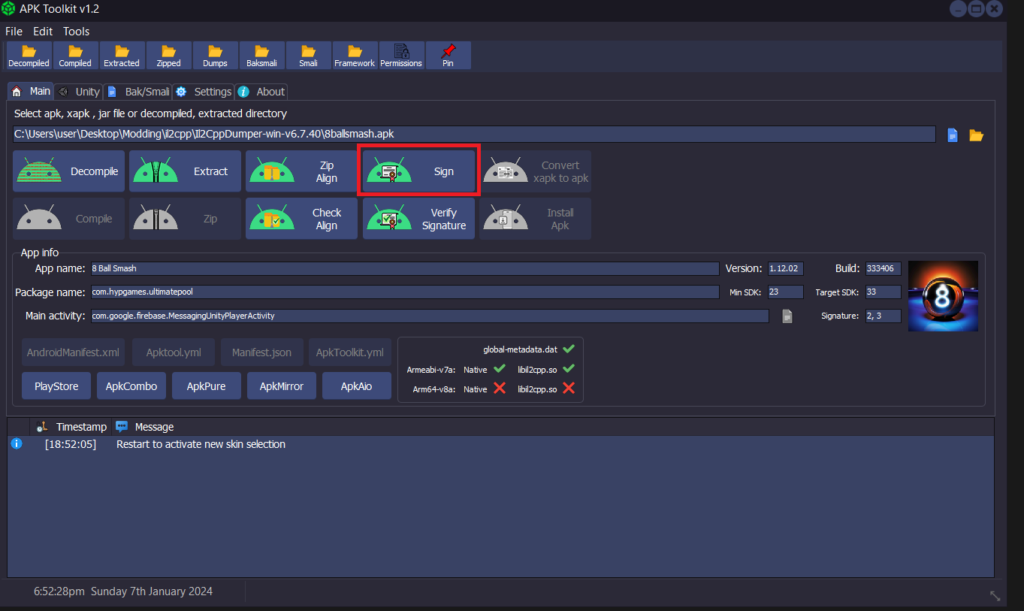
A signed APK file can be installed on any supported Android device. However, to install it, you’ll need to remove the original APK file because you can’t install an APK file with the same package name but with a different signature on top of the original or a differently signed APK.
How to Create Unsigned APK?
Requires ROOT to install
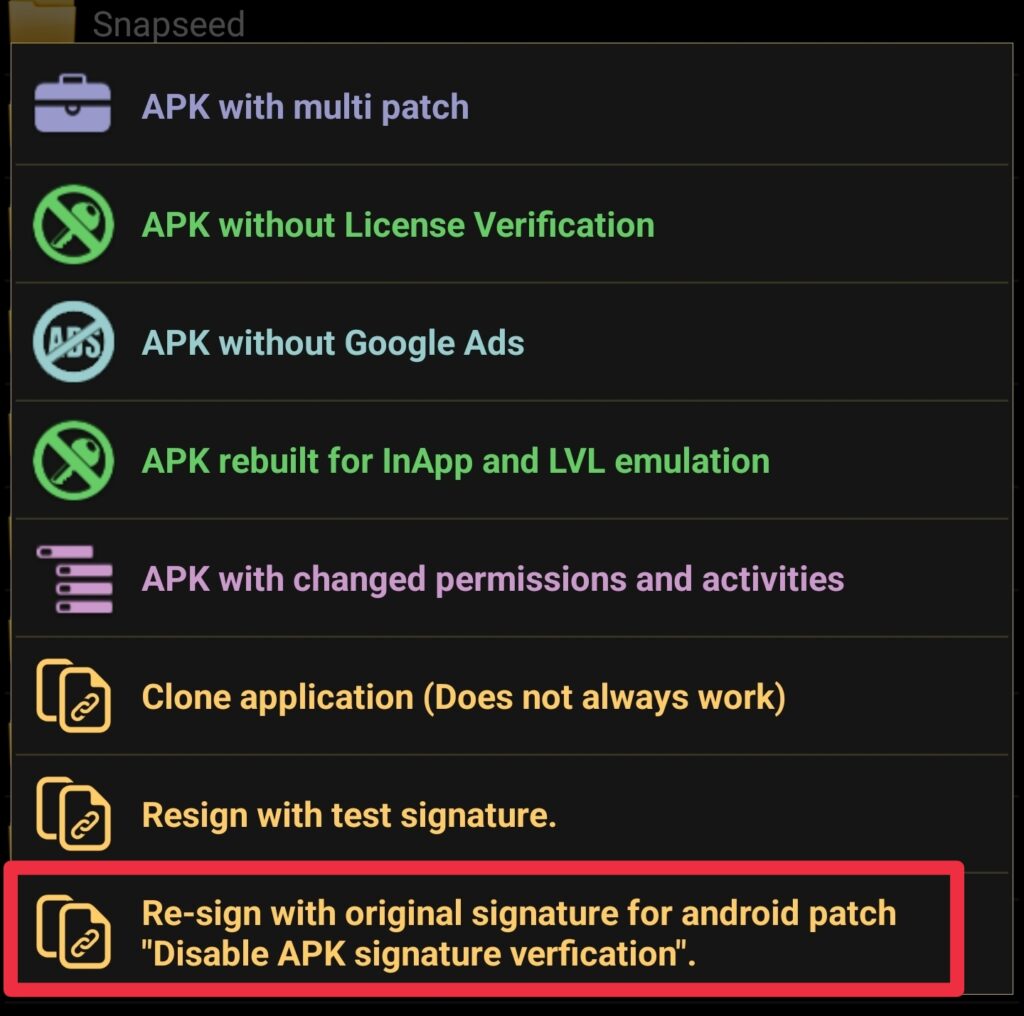
– After you make the changes to the APK, do not sign it (That is basically unsigned). Just install it directly. This will only work if you have removed signature verification using Lucky Patcher also you will need to rebuild the APK and choose “Re-sign with original signature for Android Patch Disable APK signature verification”
To apply the patches, open Lucky Patcher and grant it root permission. Click on “Toolbox”, then select “Patch to Android” and ensure you check these two options. Afterward, it will reboot your device. Open Lucky Patcher again and check if it displays “Patch Applied” in brackets. If it does, then you’re good to go. If it doesn’t then repeat the process again.
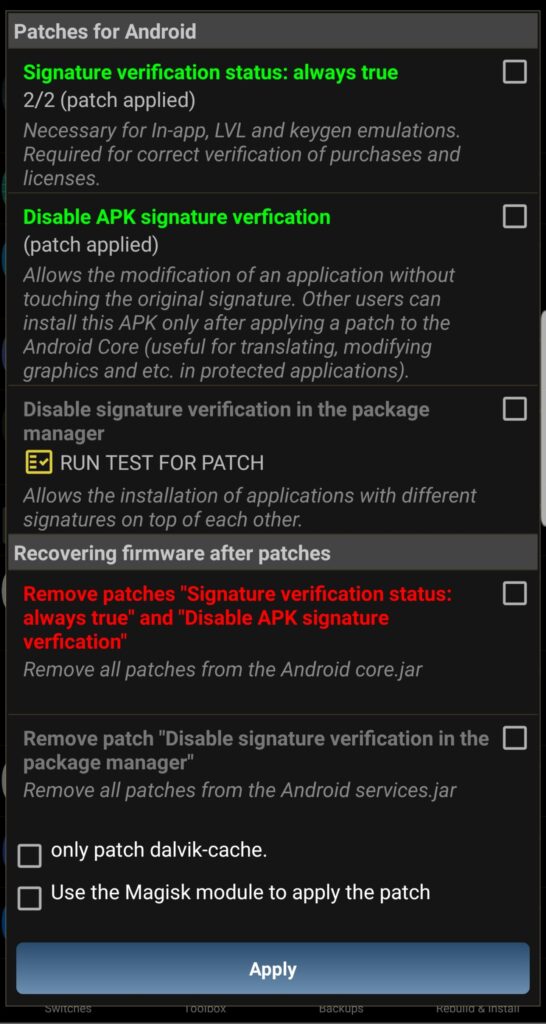
Afterward, click on the APK file, select “Rebuild,” and ensure to check the last option to sign it again with the original signature. This will enable you to install the APK file with its original signature intact, allowing you to log in to Google Play or make in-app purchases.
Now you can install APK files on top of the original one as well, also you can install APK files with different signatures on top of each other.
There are ways to do this on devices that are not rooted, but for that you need the VMOS Application, which emulates an Android device and has root access. You can search more about VMOS app.
If you have any questions then comment below, I will get back to you ASAP.